
Special Effects Printing
Special effects are a strange topic, and when I was asked to cover this subject I was a little lost for focus. This is mainly because its such a large broad area, we could argue that every time we decorate a garment it is “special”.
Today's clients request a different edge to the print they want. It needs to be different, ideally tactile ( the first thing we do to a new print is to touch it, watch the next time you show a new print to someone, they look first and touch second.) it also needs to visually set itself apart from the other prints produced day in day out.
Tactile
Tactile or “touchy” prints can add another dimension to a great design, I would narrow them down to two basic groups.
- Chemically lifted.
- Stencil Generated.
Chemically lifted prints use an additive in the ink to raise or “puff”, the amount of additive and the strength of the brand can achieve a wide range of different results ranging from a soft suede or fabric look, to a really blown up 3D image. The basic principles of using this ink are a good EOM stencil and open mesh, following the rule that the more ink we can get on to the fabric the better its going to raise. The lift happens in the dryer, so temperature is key.
The ink is always best printed last in the color order or if the customer insists on multiple special effects ( usually at least three inks that must be printed last) it must be flashed to ensure no ink is lost on a wet on wet pick up by the following screen. As the ink passes through the dryer it blows, puffs, expands, lifts or occasionally bobbles! the descriptive words that shops use for this process changes according to location, the strange thing with this ink is that it lifts firsts and then falls very much like my many failed attempts at baking! This makes correct temperature setting and time spent in the oven critical as often the ink looks like it hasn’t raised at all when in fact it has risen and dropped.

Top tip here is to play with lots of settings use speed as well as temperature. As the ink lifts it raises like a Yorkshire pudding (not as much as mine obviously) so a crisp edge is not really possible as the ink lifts up and out, giving a rounded top.
Stencil Generated tactile prints use the actual printing process to achieve a super thick layer of ink with a crisp edge and a defined lift. This is done by creating a deep well in the screen, either by multiple coats of emulsion built up using the coat dry coat method, or if you are like me and you just don’t have the patience to keep putting a 34t screen back in the dryer all day ,only to find the screen guy used it for a normal job and complained it all washed away when he exposed it for 3.5 seconds, buy some capillary film in the thickness you need, 400 is my favourite but multiple layers of lower thickness can get great results, the application of thick capillary film has been covered in many video posts and online blogs and I am not going to profess to knowing the best method, my preference is to use a flat surface and a squeegee to apply a thin layer of emulsion for the film to adhere to. (don’t forget to remove the plastic protection layer or you will have the thickest most expensive drying cabinet floor in the industry, yes I have done this, nobody is perfect.)
With a nice crisp thick stencil we can push the ink through the thick well we have created, thick ink is best for this and some companies sell enhanced ink with a good high solid count, if we use thin ink then it will sag and not create a good defined edge and if we use expanding ink it will give a rounded top and edge ( not what we want with HD prints). Look for the HD or high build description in the ink selection, again this ink is printed last to avoid pick up, however the gradual build-up of multiple screens flashed every time can give some great results, just don’t forget to raise the off contact at every screen to keep layering on top of the previous high build print
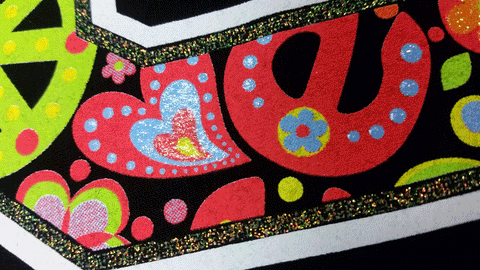
All that glitters.
A great addition to a print is the shiny or metallic look, this section really could be a section on its own as the options are numerous.
Printed metallics are an easy addition to a print and can add real impact very simply, they follow the same rule as other special effects and should be printed last to avoid any screens picking off the top layer of ink and removing any shine or lustre that we work so hard to achieve. Metallic inks are available in a limited color range and usually centre around gold, silver and bronze, but with a little creativity we can make multiple shades by adding very small amounts of color (try trichromatic colors as these are weak in pigment). A water-based metallic base is a great way to experiment with the options available as the same base can be used as a starting point, by adding yellow and red we can be true alchemists and finally turn silver into gold. Open mesh counts are required for this process and fine detail is not encouraged as the metallic elements don’t stand out visually.
Glitter is a very sparkly way to pick out elements of a design. The techniques for glitter are also relatively simple but still follow the rule of previous special effects, print them last or flash them. Glitter is basically small particles of glitter in a carrier base, this particle must pass through the mesh so a lower count is required, I prefer a 22t but this limits the amount of fine detail we can print. Glitter can be purchased as a ready to use ink or as a carrier which we add a glitter powder to, it can also be sprinkled onto wet clear ink to create stunning elements in a clever design, this is my least preferred method as it leaves little particles of glitter everywhere, these are removed from the print using a vacuum device at the end of the dryer, but there will always that one particle that sticks to your face no matter how you try to remove it, the main purpose of glitter after it has been used to decorate the garment is to appear on absolutely everything you touch for the next seven days, I have been known to find small glittery particles on my dog two weeks after visiting a glitter shop!.
Reflective
Not really a metallic and not a glitter either. Reflective ink utilizes the “cats eyes” phenomenon of glass like particles that reflect light back to the source. I have used many reflective inks and found the most impressive to be water-based, I believe this is due to the carrier not being as sticky or opaque and allowing a greater amount of light to bounce back ( as previously stated I am not a scientist and this is just a printers opinion) Reflective inks add a great safety function to hi visibility garments and can offer a great special effect to garments, again this process uses particles so open mesh counts are a requirement to allow the particles to pass through the mesh, and once again it needs to be printed last in the print order.
Foil
Foil is a secondary process, so it involves an additional process and this should always be reflected in the pricing process. Foil is a superb method of achieving a high shine image, the process involves printing a clear glue, drying the glue and then moving the garment to the heat press department where a very thin layer of metallic foil is applied using heat and pressure melting the glue, the foil is kept in contact until the glue has gone cold and then the foil is peeled away. This method gives a great retail feel to garments but has limitations, the foil sticks to anything solvent based so other colors in the design must either have foil blocker additive or be water-based, discharge is great for this.
This does not cover all the special effects available, there are far too many to cover in one article. Color change, heat reactive and even scratch and sniff are all effects that can add an extra edge to your design if used correctly, the main thing to keep in mind is that special effects are a great addition to any design but they must complement the shirt and not be used to just plonk on to use just for the sake of using them.
Article written by Tony Palmer, Palmprint
Tony has more than 30 years experience in garment decoration ranging from manual screen printing on hand carousels to the operation of multi-color automatic presses. Specifically Tony is an expert on MHM Automatics, Tesoma, Exile Spyder, Douthitt CTS, Zentner, and numerous manufacturers of textile decorating equipment.
#spsiinc #palmprint #mhmscreenprinting